
I finished building my studio over a year ago (May 2022) and I'm just now finally getting around to posting about it! I tried to document as much as possible as I went and I'll include the more interesting aspects of the build here for those interested in getting a look behind the scenes.

I had this weird opening behind my house, and decided It might make a vibey little studio. I did most of the work myself, including much of the initial construction, designing & building the acoustic treatment, some of the furniture, and I built or modded much of the audio gear I use.


The studio is a control room + iso booth and opens up to my back yard for easy access to my garden :) I left two of the walls as exposed brick to give it more of a raw look and to keep things a little splashy-sounding.
Iso Booth The booth has a vaulted ceiling, two "infinity walls" with slotted diffusion, one brick wall, and one drywall surface. Multiple surfaces with varied reflection characteristics! My intention was to maintain a little liveliness in the space as opposed to the standard dead booth vibe.


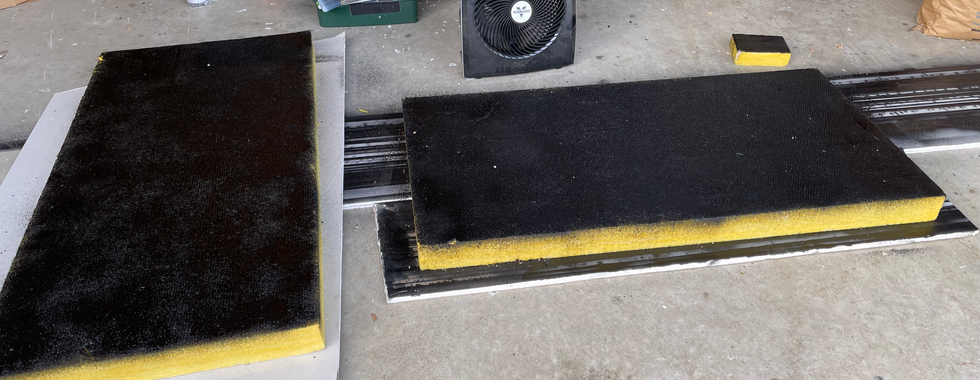
The "infinity walls" use acoustic fabric rather than drywall to make use of the absorptive insulation. I stuffed them with mineral wool, covered them with acoustic fabric, and then added wood trim to create slotted diffusers.


Wiring
I wired an 8 channel wall panel in the booth, which is overkill for such a small booth, but one can never predict what could be sent through the walls and how many channels might be needed, so I opted to overshoot. I ran the snake through conduit to protect the cabling from rogue nails and also to make it easier to fish out if I ever needed to.


Drop Ceiling
I hung a drop ceiling using Armstrong's "Shasta" rigid fiberglass planks, which is more pricey than standard paneling, but seems to be well worth it. I also used a few 2'x4' panels of 4" Owens Corning 703 in strategic places. Four are directly above my cloud (I call this "Parallel Clouds") and I also used them in all corners above my "super chunk" bass traps. I sprayed those 703 panels with "boom mat" spray-on sound damping paint, which is designed to dampen road noise in cars. This helped the panels to blend in with the other panel's mat black texture. It worked really well - you really only notice it if it's pointed out.


Cloud
I built a 4'x8' cloud and filled it with mineral wool. It hangs about 2-3' below
the drop ceiling "parallel cloud." It was a considerable challenge getting the cloud hangers in the exact right place. Lots of precise measuring and then measuring again to be sure! The hangers are connected to the original ceiling and then they penetrate the drop ceiling panels. They needed to be cut precisely so that the hangers were plumb and not pulling on the panels. I didn't have any extra panels, so I only had one chance to get this right.


Desk
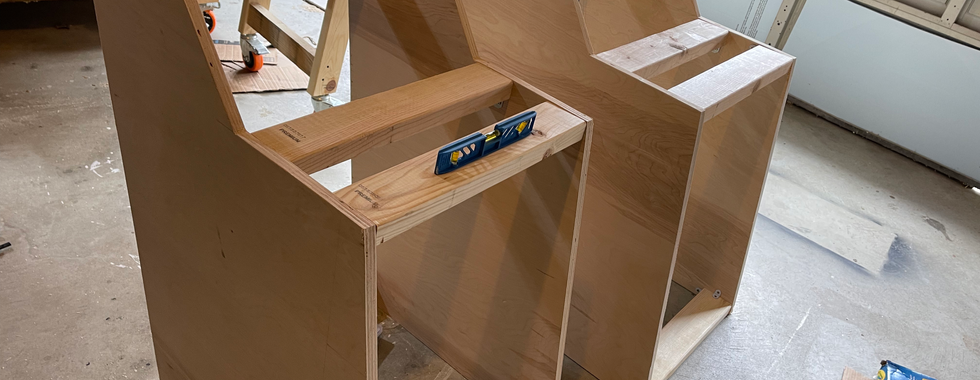
I designed and built a custom desk that fits my Tascam Series 5 console like a glove. It slanted has 19" racks on top and then vertical racks on either side. I wanted to make sure these had plenty of rack space since I don't have room for a ton of extra racks of gear to place around the room. I found a few different design ideas online and then modified them to fit my own needs.


Workbench
I also built myself a workbench nook for building, modding, and repairing gear. This is my sacred tinkering space. I love building and modding gear, but it's hard to do it without a proper workspace that's well-lit with easily accessible tools. I organized my tools on pegboard that I mounted In front of an absorption panel. Many mid-century era studios have pegboard-like wall paneling (including "Historic" RCA Studio B, where I worked for a few years), so it kind of feels like an homage to that time in recording history.


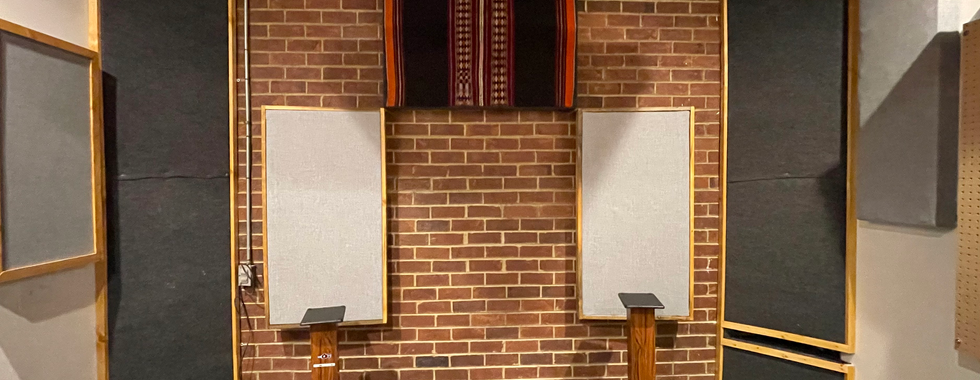
Absorption Panels + Super Chunks
I built a handful of absorption panels and placed them in choice locations. I wanted to maintain some of the liveliness in the room, so I'm mostly using thicker absorption panels for bass trapping. It felt a little pythagorean at times working on the "super chunk" bass traps in the corners. I used stained wood for trim on all panels as well as for the trim around doors, baseboards, etc... I love the look of it, but I quickly realized why most trim is white and easily painted + caulked to fix blemishes. Getting those angled cuts to seamlessly line up was quite a challenge.


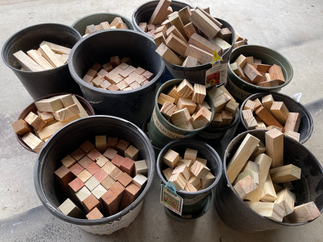
Diffusion
Finally, I built Prime Root Diffusers for the back wall. I used only recycled or scavenged wood which turned out really pleasing from a visual standpoint. I used this calculator as a design framework. It's super helpful for planning purposes, since it gives a total number of wells needed in each length. I was able to cut everything and organize them in buckets to be later glued. Cutting the wells created enough sawdust that my workspace could have been mistaken for a beach. I was a about two full days of table saw action. I feel very accomplished and I'm glad that I did it, but probably don't want to do it ever again!


Now it's time to play! The very first session was some musique concrète (hehe) with my kid. He's a big fan of pushing all the buttons on the Maestro Rhythm King and turning the tempo up to 11.


**I will eventually put together a legit Studio Page, but for now this blog post will serve as that!